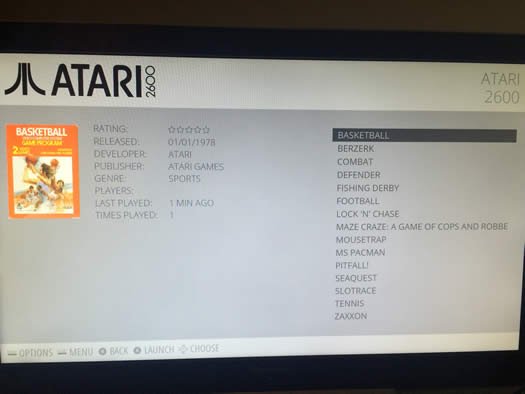
We have various iterations of several different modern consoles attached to TVs throughout our house, but sadly, all of my older games remain boxed. So for this painfully simple Raspberry Pi project, I wanted to add some retro-gaming to our collection.

Most of the heavy lifting required to build a gaming console has been done by others, which is why this project is such a fast and easy way to leverage your Pi for some old school gaming. The heart of the project is installing Emulation Station, which is a program that lets one computer system (i.e. your Raspberry Pi) behave like another system (e.g. a Super Nintendo). The emulator can in turn run game ROMs, which are game copies stored on your system.
Emulation Station has the capability to emulate a large number of classic gaming systems, though some work better than others, and some require additional configuration. For my retro gaming setup, I'm using the Sega Genesis, Intellivision, Atari 2600, PlayStation, Nintendo, and Super Nintendo emulators on my system, but there are about 20 others that are available. Check out the full list at the PetRockBlog. Emulation Station also gives you the ability to change the UI of your gaming setup with themes, and additionally includes an image scraper to help build your library of game images. Pretty handy.
While Emulation Station forms the core of gaming system, the RetroPie project is the tool that enables for easy installation and configuration of the Emulation Station software on a Raspberry Pi. So the project consists of copying the RetroPie disk image to your microSD card, configuring your system and controllers, adding ROMs, and scraping game images. The rest of the work is done for you thanks to RetroPie and Emulation Station.


Download the "RetroPie Project SD-card Image for Raspberry Pi 2" (or other image, as appropriate for your build). If you don't already have it installed, download and install Win32 Disk Imager.
A known limitation of Win32 Disk Imager is that it cannot read or write to an SD card that is inserted directly into an onboard card reader on your PC. For this reason, you'll need to insert your SD card into a USB SD card reader, and then plug that into your PC. Once you do that, you'll be able to select the disk image you downloaded, and the drive to which to write the image. Click the write button to begin writing to your card. This process will take several minutes to complete.

sudo raspi-config

cd RetroPie-Setup
sudo ./retropie_setup.sh
At this point, your retro gaming system is setup and ready for action. But you having nothing to play until you add game ROMs for the emulators to run. And this is where retro gaming becomes sticky.
Game publishers and developers still own the intellectual property rights to these games, even if they're no longer manufactured, so you still need some type of (at least) implicit license to use them. Similar to fair use with music, it is generally accepted that you can make digital copies of games you physically own, with precedence coming from the Supreme Court in Sony vs. Universal City Studios. There are repositories of game ROMs available, but exercise caution when using them. In the United States, it is illegal to download ROMs of games that you don't physically own, though no one yet has been cited or arrested for it. Be sure to scan anything you might download.
Unfortunately, it's not always simple with emulators. Several of the emulators require additional files to run. Below are the two that I ran across:
sudo mkdir -p /usr/local/share/jzintv/rom. Then copy both files into the new rom directory:
sudo cp exec.bin /usr/local/share/jzintv/rom.
Another consideration when emulating retro games is that there were wildly varying controllers for these game systems, so you might need to make accommodations with your style of play. For example, if you remember the old Intellivision controllers, that had a large joy-knob, a full number pad, and buttons on the side. In some cases, I found that a keyboard/controller combination was needed for some of these non-standard controller games.
Here's one of my favorite games running on my RetroPi system:

This is an easy way to really improve the UI of your retro-gaming console.
If your Rom files are properly named, the scraper should pull a good number of cover images automatically. If it can't find a match, it will give you the option to skip it or search for a match. If it finds more than one match, it will prompt you to select the correct one. Here is the finished product:

To exit each game, you must press the Escape key on a keyboard. I haven't yet been able to figure out how to specify via configuration files how to designate a certain controller combination as an "Exit game" command. Please holler if you have a solution that works!
This is perhaps the most detailed Instructable I've ever read.
Why build a case when you can print one? Try this model.
Ihave heard there are troubles of more than one kind. Some come from ahead, and some come from behind. But I've brought a big bat. I'm all ready, you see. Now my troubles are going to have troubles with me!
- Dr. Seuss

Hi, Shaun here. No, not the soccer player. And not the children's performer. Just me, a 40-something father of two, residing in Raleigh, NC, where the summer heat has me questioning my life choices.
I try lots of things. I'm okay at some of them. My hobby is collecting hobbies. I drink a lot of coffee. I'm susceptible to ear worms. I throw myself into the things I love. I can't wait for the weekend.